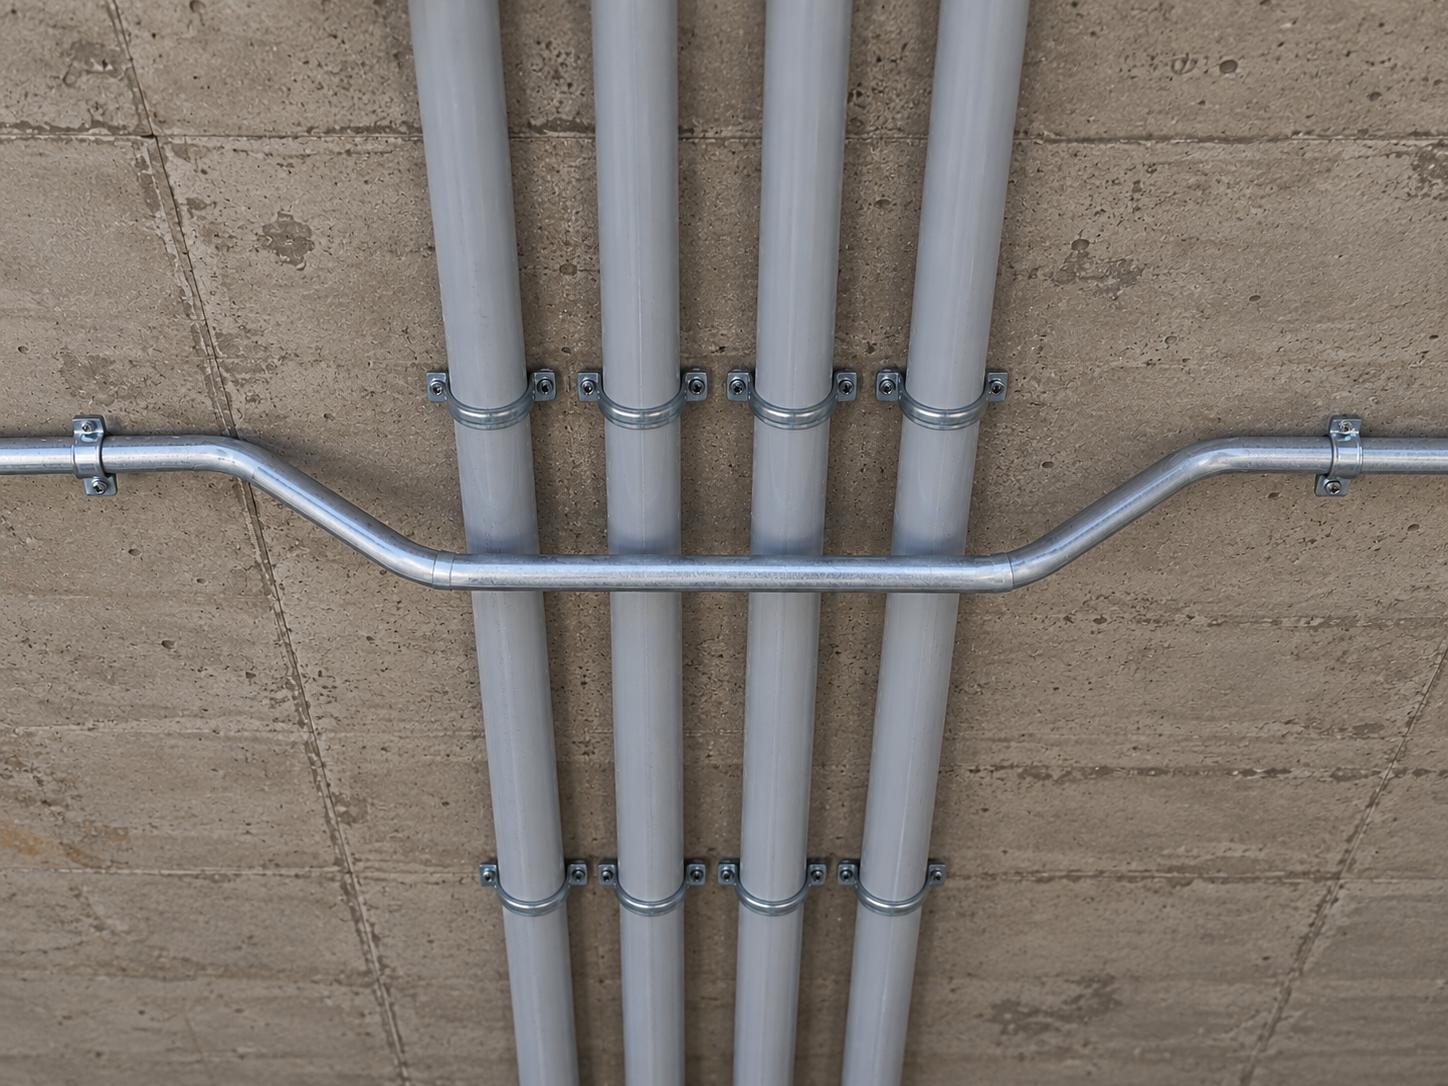
Conduit Bending Techniques Every Apprentice Should Know
This guide covers the core bend types, the tube tools you need before you start, and the terminology that shows up on tests.
Conduit Bending Techniques - Summary Table
Essential Tools: Hand bender (size-matched to pipe), tape measure, pencil, level/square, angle finder, and reference charts
Key Terminology: Stub-up, take-up, offset, shrink, saddle, gain, back-to-back, center of bend, and multiplier
90-Degree Stub-Up: Basic vertical bend; subtract take-up value before marking (½"=5", ¾"=6", 1"=8" for common sizes)
Back-to-Back Bends: Two 90-degree bends creating U-shape; maintain same plane to avoid dogleg twists
Offset Bends: Two bends moving conduit around obstacles while staying parallel; requires multiplier and shrink calculations (30° multiplier=2.0, shrink=¼")
Three-Point Saddle: Clears small centered obstructions; center bend at 45°/60°, outer bends at half that angle; best for narrow obstacles
Four-Point Saddle: Four equal-angle bends creating flat top; better for wide/rectangular obstructions; requires precise symmetry
Practice Tips: Master one bend type at a time using scrap conduit; build muscle memory through focused repetition
Basic Conduit Bender Tools and Tube Equipment
Good bends start before you mark the Electrical Metallic Tubing (EMT) material. Here is what belongs in your basic setup:
Hand bender: The primary conduit bender. Match bender size to pipe size; a ½-inch bender does not work on ¾-inch EMT.
Tape measure: Measure carefully, as a bad mark means a bad bend. Mark once.
Marker or pencil: Mark reference points before committing the metal to any bender process.
Level or square: Used to verify right angles after bending the tube.
Angle finder: Useful for confirming offset and saddle angles during an electrical conduit run.
Before you bend any conduit, check the bender marks. Every bender has reference marks, a star, an arrow, and a notch, and each lines up with a different type of bend..
Key EMT Conduit Bending Terms Apprentices Should Understand
These definitions appear in training sessions, site instructions, and licensing test scenarios. Master these concepts before picking up a bender:
Stub-up: The vertical rise of conduit out of a floor or surface. One common EMT tube curve in residential and commercial electrical conduit work.
Take-up: The length of pipe the bender consumes during a 90-degree right-angle bend. It varies by bender size; subtract it before marking the tube.
Offset: Two bends that move the EMT pipe route around an obstacle while keeping the run parallel.
Shrink: The length of a conduit shortens when an offset occurs. Account for it before the first bend.
Saddle: A series of conduit bends that clears a centered tube obstruction and returns the path to its original line.
Gain: The conduit length saved when bending a 90-degree corner rather than installing a fitting.
Back-to-back: Two 90-degree bends forming a U-shape or connecting two fixed points with continuous pipe.
Center of bend: The midpoint of the conduit curve; the primary layout and measurement reference spot.
Multiplier: A fixed number used to calculate bend distance based on offset height for your electrical conduit.
Take-up, shrink, and multiplier appear often in conduit bending calculation questions. If your study time is short, prioritize those three and expand your understanding of EMT bender properties from there. Use the tables below for a quick reference:
Table A: 90° stub take-up (EMT):
EMT size
Take-up (deduct)
½ in
5 in
¾ in
6 in
1 in
8 in
1¼ in
11 in
Table B, offset multipliers & shrink:
Bend Angle
Multiplier (× offset height)
Shrink Per Inch of Rise
10°
6.0
1/16 in
22.5°
2.6
3/16 in
30°
2.0
1/4 in
45°
1.4
3/8 in
60°
1.2
1/2 in
The 90-Degree EMT Conduit Stub-Up Bend
The stub-up bending is the primary conduit bending technique apprentices learn. It routes straight up out of floors, panels, and junction boxes.
The process is straightforward, provided you account for bender take-up before marking the tube. Follow these steps to ensure success:
Measure the desired conduit stub height.
Subtract the take-up value for the EMT size you are bending.
Mark the adjusted measurement on the metal.
Align the marker line with the correct bender arrow.
Apply even foot pedal pressure through the full bender arc.
Verify the right angle with a level or square.
A common beginner mistake involves forgetting to subtract take-up and ending up with an EMT conduit stub that lands short. For ½-inch conduit, the bender take-up sits near 5 inches, ¾-inch pipe runs about 6 inches, and 1-inch EMT conduit requires 8 inches. Always confirm against your printed conduit bender chart.
Stub-up questions target conduit math rather than mere bender tool handling, meaning those values need to be memorized before test day.
Pro Tip: Write the take-up values for ½, ¾, and 1-inch conduit on your bender with a permanent marker.
Back-to-Back Conduit Bending
Back-to-back EMT conduit configurations connect two 90-degree right angles to create a U-shape or route material between two fixed heights. Layout precision matters when running pipe up a column, along a wall, or between two panel knockouts at different elevations:
Complete the first bend at the correct tube measurement.
Measure the required spacing from the heel of the first curve to the mark for the next line.
Mark the pipe for the second curve.
Confirm both marks share the same plane before bending the tube.
Complete the second 90-degree conduit angle and verify distance and alignment.
Rotating the pipe between bends forms a dogleg: two curves that sit in opposing planes and leave the pipe twisted. Keep the bender on identical sides for both stretches, and check EMT orientation before making the second bend in your material.
The fix belongs at the conduit layout stage, rather than after the bender work is complete. A twisted stub means recutting the pipe.
Electrical Conduit Offset Bends
An offset moves the EMT conduit route around an obstacle or changes elevation while keeping the tube path parallel on both sides. Typical field scenarios include stepping the conduit pipe over a water pipe, clearing a beam flange, or dropping down to a surface knockout.
Work through the conduit bending sequence in this order. Following this workflow ensures accurate results for every EMT drop:
Measure the height of the obstruction to determine the offset conduit depth.
Choose the bender angle based on required clearance and run constraints.
Apply the correct multiplier to calculate the target gap between the two bends.
Add the conduit shrink value to your measurement before marking the initial curve.
Mark both bend points on the EMT pipe.
Bend the first angle, rotate 180 degrees, align the standard bender mark, and complete the second bend.
Verify the conduit runs parallel before and after the offset process.
Key Insight: Memorizing the 30° multiplier (2.0) and shrink (¼ in.) alone covers the majority of field offsets.
Three-Point EMT Conduit Saddle Bends
A three-point saddle clears a small, centered obstruction, a tube or conduit crossing your path, and returns the run to its original line. The center pipe bend carries the largest angle, and the two outer bends split that bender angle on each side to balance the saddle.
Follow this conduit bending sequence to maintain correct alignment. Accuracy at the center point prevents misalignment issues further down the pipe run:
Locate and mark the center of the obstruction on the conduit metal.
Bend the center mark to the required bender angle: 45 or 60 degrees, depending on obstruction height.
Calculate the distance from the center bend to each outer mark: multiply the obstruction height by the multiplier for the center angle you chose from Table B above, 1.4 for a 45° center bend, or 1.2 for a 60° center bend.
For example, a 3-inch obstruction bent at 45° needs 3″ × 1.4 = 4.2″ from the center mark to each outer mark.
Mark both outer points on the EMT pipe.
Flip the material and bend each outer tube mark to half the center angle, creating a balanced conduit saddle.
Lay the piece flat to confirm the conduit sits level and the pipe saddle clears the obstruction.
If the center EMT measurement is off by a small margin, the saddle shifts and the material fails to clear the obstruction on both sides. Take the extra seconds to hit that center bender mark; it determines whether the entire conduit piece works or requires bender rework.
Four-Point EMT Conduit Saddle Bends
A four-point EMT conduit saddle uses four equal bender angles to create a flat top across the obstruction. It stands as the superior conduit bending choice when a three-point saddle produces a sharp peak, or on wider or rectangular obstructions where a flat-top tube crossing is preferred.
Precision during measurement prevents twisted EMT pipe outcomes:
Measure the full width and height of the obstruction.
Calculate the flat-top conduit length: measure the obstruction at its widest point and add a ¼″ to ½″ buffer on each side so the conduit doesn’t rub.
Then find the travel distance for each of the two offset pairs by multiplying the obstruction height by the Table B multiplier for your bend angle — 2.0 at 30° or 1.4 at 45° — and double the Table B shrink value, since a four-point saddle is two offsets back-to-back.
Mark all four points of symmetry on the EMT pipe.
Bend all four marks to the same bender angle: 30 or 45 degrees, depending on clearance needs.
Verify the conduit lies flat before and after the saddle and that the flat section clears the obstacle without bender interference.
Symmetry between all four conduit pipe measurements matters; one incorrect point throws the entire saddle out of alignment. Here is a quick comparison:
Three-point saddle: Best for small, round, or narrow EMT conduit obstructions. Faster to lay out and bend.
Four-point saddle: Best for wide, rectangular obstructions or runs requiring a flat top. Strict conduit layout required, but superior results on larger crossings.
Tips for Practicing Conduit Bending with Confidence
Master one bend type at a time on scrap conduit before moving to the next. Short, focused reps build muscle memory that also makes exam calculation questions feel automatic rather than stressful.
Build Stronger Electrical Skills with Dakota Prep
Hands-on conduit-bending reps build muscle memory. Exam-aligned study means you walk into the testing center knowing the material.
Dakota Prep acts as the study-side partner mirroring the conduit drills above: short reps, clear corrections, and targeted repetition until the EMT material sticks. Here is what the software delivers:
3,000+ NEC-aligned practice questions vetted by certified electricians
State- and level-specific exam tracks for Journeyman, Master, and Contractor exams
Full access on web, iOS, and Android; study during lunch, on a commute, or after a shift
An NEC-trained AI Tutor that explores calculation-heavy conduit bender questions step-by-step and fields follow-up queries the way an instructor would in a classroom
The platform supports 20,000+ learners across 80+ apprenticeship programs and colleges.
Want to pass your trades licensing exam on the first try?
Download now to access thousands of practice questions across electrical & plumbing for US and Canada